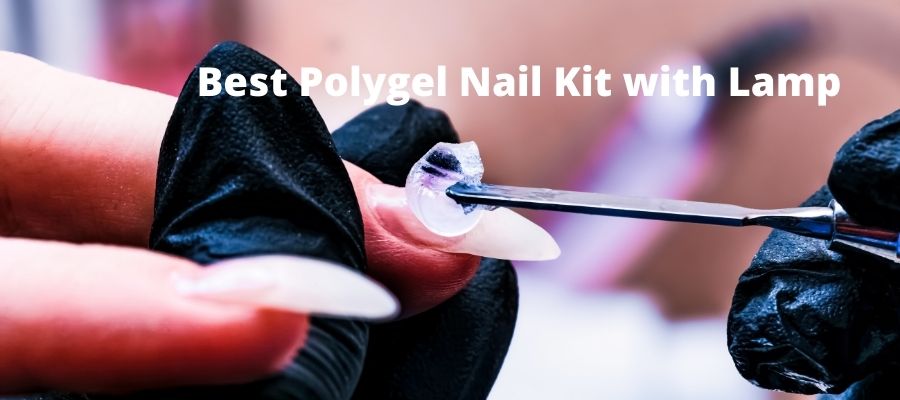
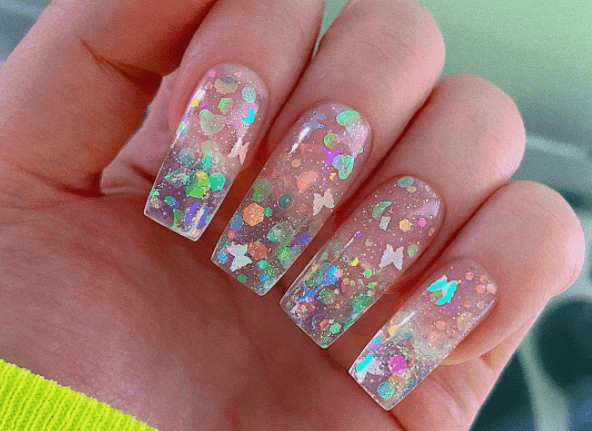
Polygel nails are popular to give a presentable, artistic, and pretty look to the nails. Plus, it has the fame to ensure lustrous shine and finish. Today, the popularity of polygel nails, including a nail lamp increasing due to offering easy application, lighter, and long-lasting features. Surprisingly, if you have a polygel nail extension kit, especially with a lamp, you can reduce the expense of a salon manicure.
So, what is the best polygel nail kit with a lamp? The best polygel nail kit with lamp offers all essential manicure items for fast and easy nail design at home. The design will stay more than 2 weeks to one month, even longer. Plus, the lamp offers adjustable timing and easy-to-operate facilities.
But, it isn’t easy enough to pick the best polygel nail kit with a lamp because of lots of similar and available products. We enlist and review the top 5 best products in the following section to facilitate you, so let’s get started.
A quick comparison Guide: Top 5 best polygel nail kits with lamp 2021
| Name | Items | Lasting | Curing time |
| 1. Modelones Poly Extension Gel Nail Kit | Six-color gel tubesA multi-brush, 48W Nail Lamp24PCS Curved and 24 PCS Straight Dual FormsA nail fileA 10ml top and base coat and Other manicure tools. | 2-weeks or more | 90sc |
| 2. SXC P-02 Polygel Nail Kit With LED Lamp | 6pcs 30ML extension gel6pcs glitter powder8ml top and base coat24w fast nail dryer andOther essential tools except for slip solution. | one month or longer | 3 minutes for one finger |
| 3. Phoenixy 6 Colors Poly Nail Gel Kit with LED/U V Nail Lamp | 6 tubes of polygel80W nail dryer10ml top and base coat 30ml Slip Solution andOther manicure tools. | 2-weeks or more | Base-coat needs 1 min, and the polygel needs the 30s. |
| 4. COSCELIA Poly Gel Nail kit with Led Lamp | 50x Dual Forms6 15g polygel tubesTop Coat & Base Coat30ml slip solutionCuticle Oil36W lamp, and Other manicure solutions. | one month or longer | You can choose your preferred timing from the 60s/90s/120s. |
| 5. Makartt Poly Nail Extension Gel Kit with Led Lamp | 3 15g Nail Extension GelSlip solution8ml Base Top Coat Gel60pcs Dual Forms6W nail dryer andOther manicure tools. | up to one month or longer | One minute is enough to cure. |
In-Depth Reviews: 5 Best Polygel Nail Kit with UV light 2021
The following sections will review the top 5 polygel nail kits with a lamp for beginners and professionals.
1. Modelones Poly Extension Gel Nail Kit – Best all-in-one Nail lamp solution
Why Choose this Nail Kit?
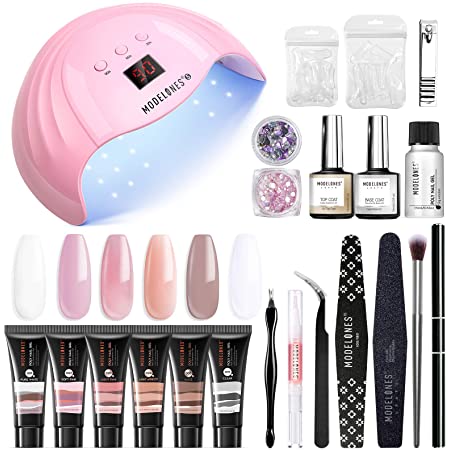
There are multiple reasons behind picking this gel nail kit with a lamp. Firstly, it will help you to shape your nails, which uplifts your confidence and ensure an artistic look. Secondly, the 6 different colors will ensure a jazzy look based on your occasion. Thirdly, this nail kit helps to get salon effects any time, any place.
Highlighted Features:
1. Ideal for complete nail care
50% alcohol
six-color gel tubes
multi-brush
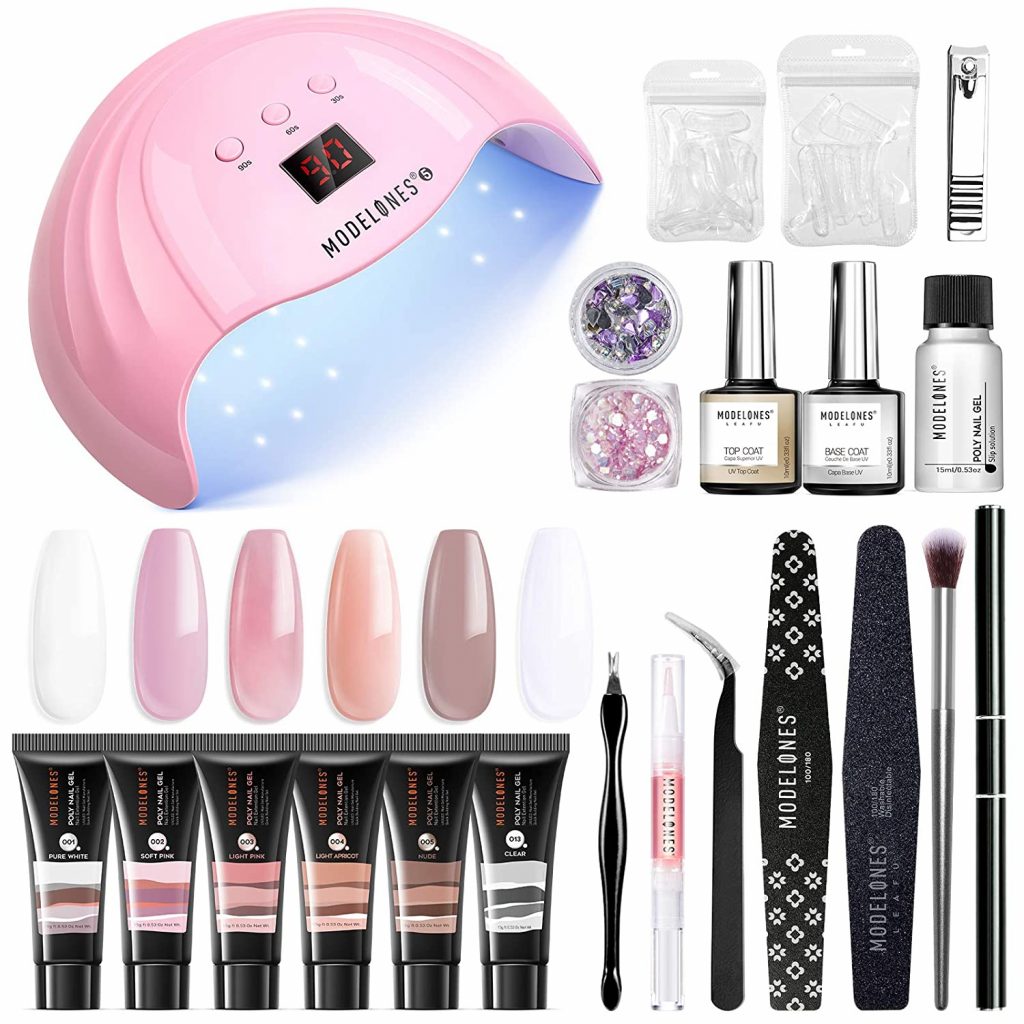
Modelones Poly Extension Gel Nail Kit offers a complete package of nail care in a cute square box. You will get six-color gel tubes, a multi-brush, a slip solution, a nail file, 24 PCS curved and 24 PCS straight dual forms, and a top and base coat on that package.
The slip solution has 50% alcohol which hopefully serves you well.
We find the gel tubes seem small, but you don’t need a lot to apply unless you have super long nails. That gel tube set will help you to do 10 more sets of nails.
Plus, each gel tube helps you in 2 full manicures on your long nail.
The power lamp seems cheap, but it will serve you nicely to cure all polish. You need 90 sec to ensure your nails are dehydrated.
One word of caution: When you use the lamp for more than 30 seconds, it may feel you burning.
2. User friendly:
- Power lamp
- User-friendly mechanism
All the kits from the Modelones Poly Extension Gel Nail Kit offer a user-friendly mechanism. The use instructions are details and simple to get.
The slip solution offers an easy-to-work facility. Like most users, you can apply poly gel straight to nails, put the mold, and then smooth it out using the slip solution.
The gel tubes offer a great job while starting you off; therefore, you can easily store and use them for a long time.
The power lamp will turn on when you put your hand under it or touch the top fingerprint and then set the timer.
3. Long-lasting Gel
Our top-picked nail gel will last up to 2 weeks or more if you prep (filing, buffering, and cleaning) your nail correctly. However, if you apply nail dehydrator and primer, your nail will last much longer.
Some limitations:
- The light color may not be visible much.
- The color gel tubes are small; therefore, you may face a little bit of a problem while using them.
- This poly gel kit isn’t for beginners because it demands lots of practice.
How to apply (4 easy steps)?
| Steps to follow | How to apply |
| Step 1 (Apply the base coat) | Apply base coat at first and then cure with a nail lamp. |
| Step 2 (repeat the 1st step and air dry) | Repeat the first step until you get your desired effect, and then air dry for 2 to 3 minutes. |
| Step 3 (remove the sticky layer) | Now, cure and then pop off the dual foam’s sides and then remove the sticky layer. |
| Step 4 (cure with nail lamp) | Finally, apply the base coat after shaping your nails and then cure with the nail lamp. |
Pro Tips:
- Before applying the base coat, you have better wipe with alcohol.
- You can mix one color with another to make a new one.
- Try to ensure the nail extension’s tip on the dual foam is much thinner. That makes the trimming easy and shapes the nail extension.
- It will be better to avoid too-thin layers because they are easy to shape and hard to crack.
2. SXC P-02 Polygel Nail Kit With LED Lamp – Best Beginner Friendly Nail Kit.
Why we choose this Nail Kit?
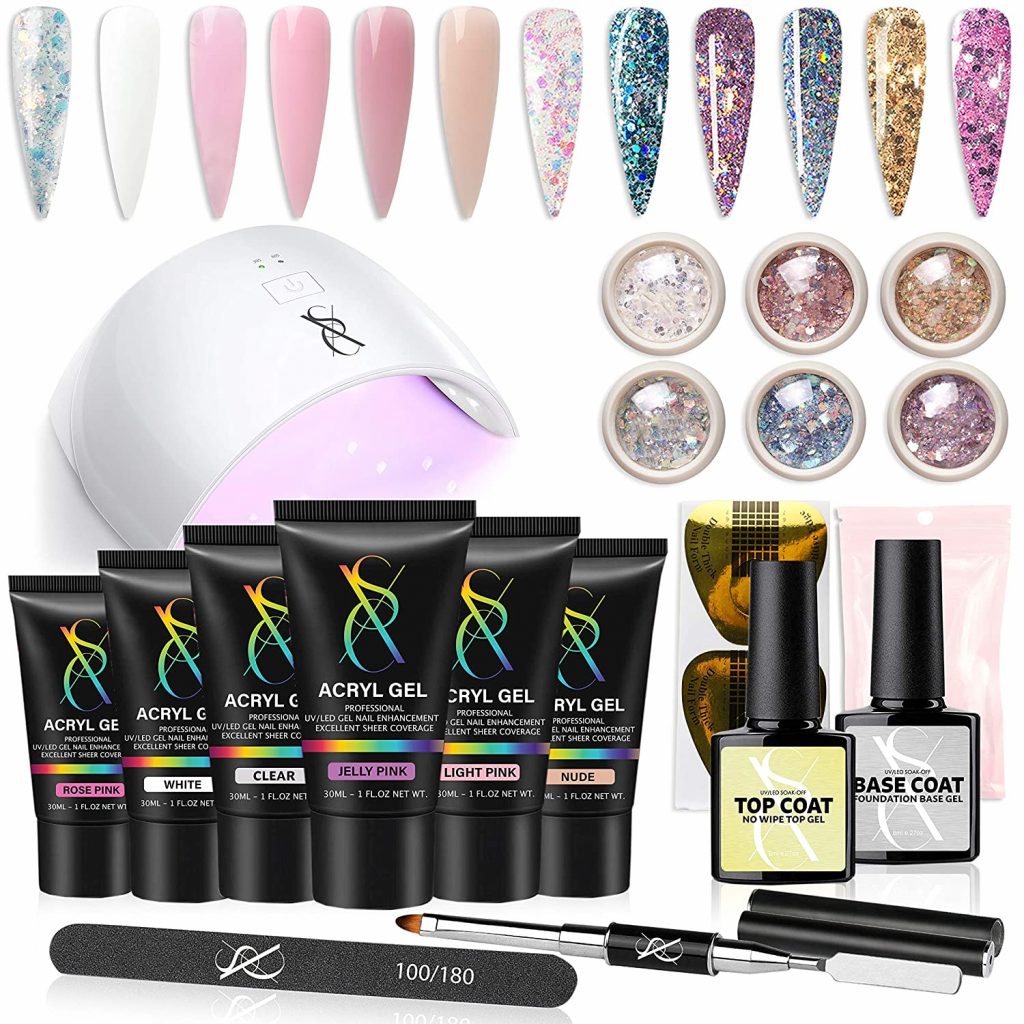
First, let’s clarify the query of why we choose this nail kit. Firstly, this complete nail kit offers a great job done to the beginner as well as those who have experience. Secondly, the offered polygel tubes are roughly 2 times larger than other available polygel tubes.
Thirdly, the package includes 6 premium nail glitter that helps to show your creativity and create your own style, and we find this kit is less expensive than the nail salon trip.
Highlighted Features
1. Package offers complete nail design solution:
- 6 large polygel tubes
- 6pcs powder glitter containers
- 24W nail dryer
Our 2nd picked Poly Nail Gel Kit offers 6pcs 30ML extension gel, 6pcs glitter powder, and other essential tools to take your nail design to the next level.
Interestingly, the 6 colors polygel comes in 30ML tubes, whereas other brand kits offer only 15ML tubes.
Besides, the 6pcs glitters hopefully great to give any type of special glitter effects. The glitter quantity is enough to help you do 10-20 sets, but it will depend on how many fingers you apply. The brush and spatula are also fantastic; with that, you can just flip and scoop and flip and shape.
Notably, this package offers a no-slip solution but don’t worry; you can use 70% isopropyl alcohol or nail cleanser instead. Another blissful item is a 24W nail dryer which will help you dry one finger in 3 minutes.
2. User-friendly Application
- Beginner-friendly
- Easy-to-use features
If you are a newbie, you can easily get a satisfying result following simple instructions from the package or YouTube video. You don’t face problems applying the nails. Another feature we like is the molds which help you to get the perfect shape.
Moreover, you hopefully don’t face difficulty squeezing out of the tube because it isn’t too thick or too runny.
3. Long-lasting
This polygel kit is long-lasting, gorgeous, strong, and good for your natural nails. Surprisingly, if you do proper nail prep like filing, buffering, and cleaning, it will last up to one month or longer.
4. Dual Form & Golden Forms
In this polygel kit package, you will get so many different size (70pcs) dual forms which are easy to use.
Notably, the dual foams have extra plastic around; you don’t need to trim while making the forms.
Plus, it offers a curved design for those who love it. Apart from the dual forms, this kit offers 30pcs golden nail, which is double that other offers.
Some Limitations
- The kit offers a no-slip solution; that’s why you have to depend on the alcohol.
- We find the nude color is very sticky, constantly oozing out of the bottle whenever open; therefore, the application may take a little bit of time.
How to apply (4 easy steps)?
| Steps to Follow | How to Apply |
| Step 1. (Preparation) | Firstly, you need to trim and clean your nail bed. |
| Step 2. (Apply Base Coat) | Now, take the base coat to apply and then cure. |
| Step 3. (Use Dual Form) | After that, take and form the polygel on dual form and then apply dual form and cure. After a while, you need to remove the dual form. |
| Step 4. (Apply Top Coat) | At this stage, your task is to trim and then shape the polygel extension. The final task is to apply the top coat and then cure. |
Pro Tips
- If you want better gel out, you have better soak the tubes in lukewarm water.
- You can mix one color with another to form a new one.
- To remove the sticky layer, you need to wipe both sides of the extension with alcohol.
- Though the polygel is sticky so, you have to be careful during handling. You have better hold through sidewalls and flip then fill and shape.
- If you want better lasting effects and results, you can apply nail dehydrator and primer after nail preparation.
3. Phoenixy 6 Colors Poly Nail Gel Kit with LED/U V Nail Lamp- Best All-In-One Starter Kit with Slip Solution Gift
Why Choose Phoenixy?
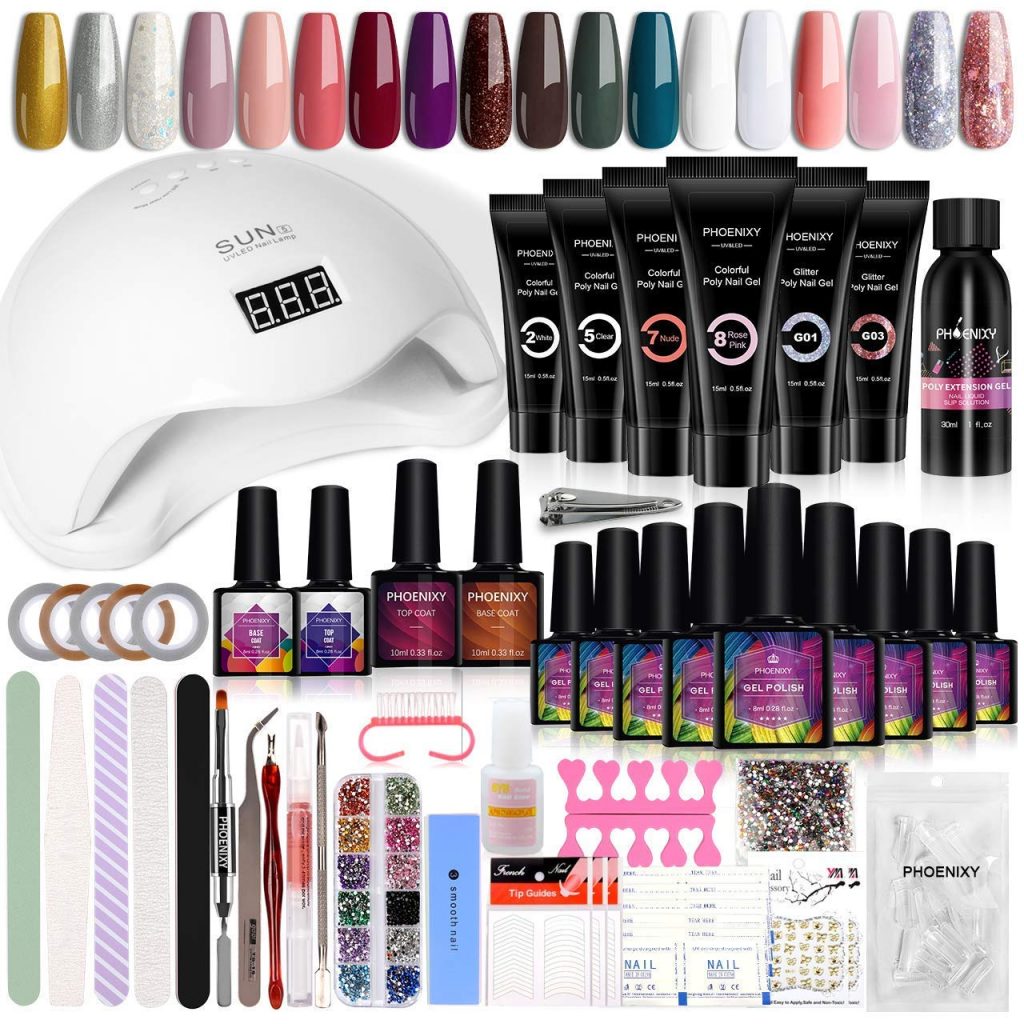
Some blissful features place this nail kit on our list, so let’s see those. Firstly, Phoenixy made nail kit is durable, user-friendly, and easy to use. Secondly, this nail kit will help you to get a beautiful and natural look and design based on the occasion. Thirdly, you will find multiple ways to use this poly nail gel kit.
Highlighted Features:
1. Includes all essential items to decorate nails
- 6 different colors
- Rhinestones and stickers
- Automatic LED & UV lamp
Our 3rd picked polygel nail kit offers everything a beginner needs. Here include 6 tubes of polygel where each comes in 0.5 oz tubes. You will find 2 pinkish, 2 milky, 1 white, and 1 nude, which seem pretty and nail art. Moreover, you will find a full-size base and top coat.
Note: The base coat seems sticky; therefore, you may face problems keeping it clean unless you start and finish each nail individually.
Furthermore, this package offers a beautiful brush and spatula combo. Another interesting items included are rhinestones and stickers, which help to get a unique effect.
The LED and UV lamp comes as perfect in size and starts automatically when put in hand. We find the lamp works well and fast to add gel color over the poly gel. You can do 1 min cure for the base, and the poly gel requires the 30s to cure.
2. Easy-to-use
- User-friendly instructions.
- Durable
This nail kit includes easy-to-follow instructions. With that, you can easily turn your nails great at the first attempt. Plus, while using, you will not face any flaking or lifting-related issues. Don’t worry, the durability also ensured.
The tube mechanism lets you spread the gel easily.
The UV light offers salon quality, and the light also seems good, which cures this polygel and others as well.
3. Long-lasting
Phoenixy made nail extension gel will stay up to about 2 weeks or more if you ensure proper filing, buffering, and cleaning.
Another point worth noting is the nails will stay in place until you clean your natural nails properly before using the gel.
4. Multiple-use facilities
This best polygel nail kit with lamp can be used in 3 different ways:
- You can make your poly nail using the dual form.
- The package offers decorations to decorate your nail.
- You can paint the gel over this poly extension gel.
Some Limitations
- The polygel tubes seem quite small to us.
- The packing isn’t up to the mark and unprofessional.
How to apply (5 easy steps)?
| Steps to Follow | How to Apply |
| Step 1. (Preparation) | Firstly, you need to file and then clean your nail. |
| Step 2. (Apply Base Coat) | Now, apply the base coat and then use UV/LED to cure. Then choose any suitable nail tip and apply poly extension gel. |
| Step 3. (Stick the nail) | After that, take a brush and dip some slip solution. Then again take a brush and slip solution to shape gel smoothly. Now, stick the gel with your nail and ensure fully plying and cure. |
| Step 4. (Remove false nail tip) | Next, remove the false nail by swing gently from left to right and trim and shape the poly gel nail. |
| Step 5. (Apply top coat) | Finally, finish your nail design by applying a top coat and cure it. |
Pro tips
- If you want better adhesion, you can apply a nail base coat and top coat.
- Use a slip solution to dip to prevent the gel from sticking to the brush or other tools.
4. COSCELIA Poly Gel Nail kit with Led Lamp – Best User-friendly Nail Kit
Why choose COSCELIA Poly Gel Nail?
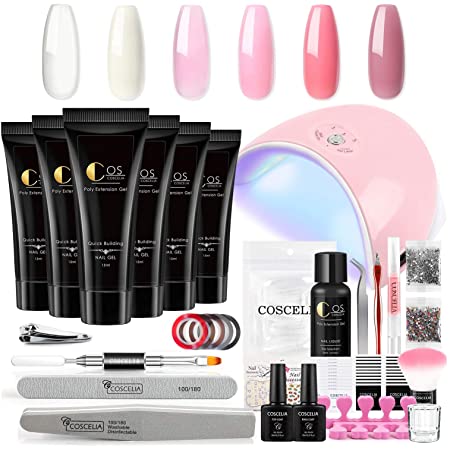
We keep this poly gel in our 4th list for some blissful amenities. Firstly, this complete poly nail kit is a perfect gift for any occasion. Secondly, you will get unique nail art through this polygel for dating or working occasions. Thirdly, this complete set is ideal for beginner and salon use.
Highlighted Features
1. Complete nail care solution
- Natural & toxin-free ingredients
- Suitable lamp light
COSCELIA made polygel offers all the necessary items that you need to design your nail differently. Six different colors come in 15ml tubes that seem small in quantity. The color appears nice among them, four are translucent, and 2 are opaque.
Notably, we find the used ingredients are toxin-free, low odor and safe. The natural ingredients of the top and base coat will not cause any harm to your nail.
To get an artistic look, this nail kit package offers nail rhinestones and nail striping tape lines.
Another nice tool is the nail lamp which offers three adjustable timers to dry the nail safely. The lamp light is suitable for acrylic nails, UV gel nails, false nails, and natural nails.
2. Easy to use
- User-friendly mechanism
- Easy-to-operate lamp
The package offers a user-friendly mechanism that helps to perform an excellent job for the beginner. We find sculpting onto the dual form is easy.
The lamp can connect to the power using a computer and mobile charger and quickly set the desired timer.
3. Long-lasting
After ensuring proper nail preparation like filing, buffering, and cleaning, your design will stay one month or longer.
Some limitations
- We find no color name on the tube except the number.
- The manufacturer doesn’t offer good packing; instead, everything is just put into a small box.
- The instructions aren’t clear and do not mention an essential query like cuticle oil use.
- The brush won’t serve well after one use.
How to use (Easy 5 steps)?
| Steps to follow | How to apply |
| Step 1. (Preparation) | Firstly, filing your nails smoothly using a nail file. |
| Step 2.(Apply Base )coat | Now, apply a base coat that should be thin and then cure with a UV (the 60s) /LED (30s) lamp. |
| Step 3. (Choose Dual form) | After that, take acrylic or ball of gel and then select your desire dual form. Then apply the gel to your nail tip. |
| Step 4. (Use nail brush) | Now, spread gel smoothly using the Dual-ended nail brush. |
| Step 5. (Attach the nail) | Finally, you need to stick the nail tip on your nail and clip it together and then cure it. |
Pro tips
- Ensure good filing your nails before applying the extension gel, and then apply more primer to prevent extension gel’s peel off.
- Apply top coat to ensure shiny and stay longer nail art.
- The curing time will vary on the different power of the nail lamps.
5. Makartt Poly Nail Extension Gel Kit with Led Lamp- Best Starter Kit
Why choose Makartt Nail kit with Led Lamp?
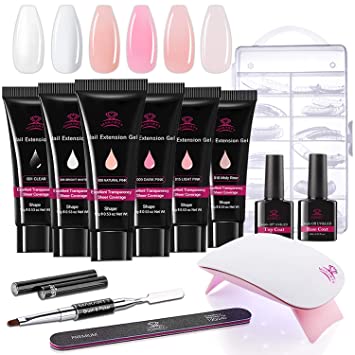
This poly gel kit offers some blissful amenities that impress us to keep on this list. Firstly, this poly gel kit offers an easy-to-use mechanism that’s why the beginner can use it easily. Secondly, here you will find all the necessary items to get an artistic design. Thirdly, the items can be used in three different ways.
Highlighted Features
1. Complete Poly nail extension gel Kit
- Offers all basic tools
- Small & portable lamp
Our last picked best polygel nail kit with lamp comes with three different colors, multiple basic tools to design your nails. We find clear, natural pink and dark pink colors, which come in 15g tubes. Moreover, this package includes glitters, gems, rhinestones, mirror powder that will help you to beautify the nail looking.
The nail buffer seems nice, but the nail file seems weak. Don’t need to worry because it will help you in the perfect filing. The nail sizes we hope to go from 0-11.
The led lamp is very small and portable; you can use it through a micro USB cable. The start button lies at the top, and when you press the lamp will run for a minute. Hopefully, that time is enough to cure your nails perfectly.
2. User-friendly mechanism
- Straightforward instructions
- Quick application
We find this polygel offers beginner-friendly and offers stronger, flexible, and easy-to-control amenities.
The applying process perceives much quicker than acrylic.
The instructions seem straightforward; hopefully, you don’t need a lot of details. The led lamp can be carried easily and run through a USB cable.
3. Long-lasting
You can keep it up to one month or longer after ensuring proper nail preparation such as filing, buffering, and cleaning. Therefore your salon expenses will reduce slightly.
Interestingly, you may know our new cuticle area will grow every two weeks when you see that you can refill easily.
4. Multiple ways to apply
This polygel kit allows you to use it in three different ways based on the occasion. Here lies a dual form that can be used alone. Another way it enables you to use it with nail form. The last method is you can decorate your nails through glitter and other nail gel.
Some limitations
- It seems very sticky to us, so be careful while using.
- They only offer three colors in the average size tube.
- The led lamp is small; therefore, it takes a little bit of time to cure.
How to use (Easy 5 steps)?
| Steps to follow | How to apply |
| Step 1. (Preparation) | To begin with, you need to do proper nail prep like filing, buffering and cleaning. |
| Step 2. (Apply coat) | Now, take the base coat to apply and cure properly. |
| Step 3. (Use dual form) | Firstly, apply some gel on the dual form. Secondly, take the brush and dip it in the slip solution. Thirdly, form the gel and apply dual form. |
| Step 4. (Use lamp) | Now, take the lamp and cure properly and then remove the dual form, |
| Step 5. (Prep again) | Use the file to shape your nail and apply the top coat and then cure. |
Pro Tips
- If the coats seem thin, then you can ensure curing between each layer.
- If your slip solution finishes, you can use alcohol instead.
- If you face a problem squeezing out the gel, you can put it into warm water to make it normal.
The process of choosing the best Poly Gel Nail Kit with Lamp – Buying Guide
Though there are many different items in this arena, the following guide will help you choose the suitable one.
- Quantity: If you want to reap maximum benefits, you have better go for full-size products. Some poly gel kits come in different sizes (15g to 30g) to ensure your multiple applications.
- Material: Naturally, the good-quality products offer you good service and do not harm your nails. Plus, good quality products will ensure smoothness and natural nail growth. One important factor is you have a better look at toxic-free ingredients while investing in a nail kit.
- Color Options: The more color option allows you to get your desired design on nails. Most of the available poly gel offers up to 6 color options; hence you don’t face a problem getting one. For the color, you can choose pink, clear, natural, white and others that attract you.
- Lamp: Curing needs multiple times at different stages while doing manicure through the poly gel. People mostly use LED and UV lamps to cure poly gel nails. That’s why lights demand extra care while buying. You have a better look at medium size, portable and USB cord. Plus, try to opt for the lamp that offers adjustable timing.
- Texture: While buying a poly gel kit, you have better choose a smooth texture because it is essential for a shiny finish. Another point should keep in mind is to try to get the poly gel that doesn’t dry up in the bottle and offer good consistency.
- Price: The average price of a good quality poly gel kit stays between $20 to 50$. If you want more tools, you may have to spend more than the average. However, it will be better to choose the poly gel kit within your budget.
FAQ – Best Polygel Nail Kit with lamp
Are LED Nail Lamps Safe?
You don’t need to spend a long time under an LED lamp for curing that frequent and short time spending won’t increase the skin cancer risk. Learn more.
Does poly gel ruin your nails?
The good quality and proper application of polygel nail kit will not hurt your nail. Note: You have to be careful while removing it.
How do you remove poly gel nails?
You need patience and care while removing polygel nails. During removing polygel kit, you can soak nails in acetone or use a file.
What lamp is best for PolyGel?
Although polygel isn’t self-leveling, it will stay where you apply it. Plus, similar to acrylic, polygel doesn’t become hard until you cure using an LED or UV lamp.
You can go for one that offers an adjustable timer and portable features. Plus, you can see the curing time, like about 30 seconds in LED and 2 minutes in UV lamp.
Final thought
By now, you hopefully know the polygel nail kit offers a hassle-free gorgeous manicure at home. Once you have one of these products, you can quickly achieve beautiful nails without spending money on salon appointments.
From our top 5 polygel nail kits, the Modelones Poly Extension Gel Nail Kit offers a good quantity of gel extension and so much beginner-friendly.
If you have budget constraints, you can choose the Phoenixy 6 Colors Poly Nail Gel Kit with LED/U V Nail Lamp. So, take one of those kits from our listed best polygel nail kit with lamp to ensure an artistic look of nails at home.

